
 |
| The selectors for speed, feed, threading, carriage direction, etc. |
 |
| Thread cutting chart for my machine. Any lathe that can cut threads has a chart which lays out the position you will need to put the corresponding leavers in to cut whatever thread you want. |
 |
| My machine has a four position spindle selector. One of the positions is "threading." The others are Off, Forward and reverse. When I am going to thread a piece I select "threading" and the drive motor runs at a pre-set speed which I believe to be around 100rpm. |
 |
| Select lead screw which is designated by the red dot. |
 |
| Here's the tool I use to cut internal threads. This is where you need to be exact. This tool needs to be ground to 60 Degrees. |
 |
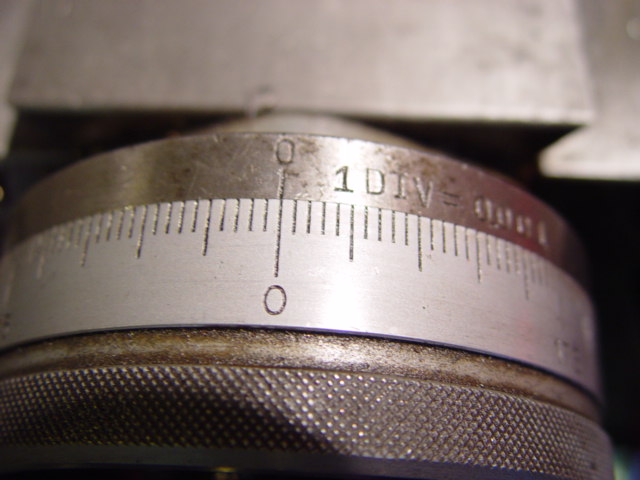
| Pictured is the thread count dial or the half nut dial or whatever you want to call it. Here is the deal with this. Notice the notch in the housing which is lined up with the notch above the 4. For this particular job I decided to cut 8 TPI, so every time the 4 lines up with this mark I can engage the half nut leaver. 8/2=4 so that's why I chose the 4. If you are cutting 6 TPI than use 3 as your engagement mark. For something like 13 TPI I use the 1 as a reference. The rule is that the TPI # needs to be divisible by the number you are selecting on your thread counter dial. I choose to go with the number that is closest to the TPI I am using. 8 is divisible by 2 as well but 4 is the closer number so that's what I use. Whatever number you start with you need to use for the whole job. This is the only way to ensure the tool stays in the same path every cut. |
 |
| Pictured is the dial on my cross slide handle. I zero it on the work piece than turn it in (when cutting external threads) or out (when cutting internal threads) .010 at a time. When the thread cut is at .050 deep I make 3 or 4 passes or until I'm not removing any more material to ensure I'm at the depth the dial is reading. Once sure I continue the cut as long as the thread depth calls for it. |
 |
| Pictures is the finished bung for the gas cap. |
 | |||
| This is a picture of the aluminum before cutting the thread. Notice the chamfer and the run off. The chamfer is important because it allows the tool to cut as deep as your going to need. Without it your workpiece and/or tool will flex when running it in and the cut will not be accurate causing a tight spot on the threads. The run-off at the end is done to act as a stopping point for the tool so it doesn't crash into your work. I forgot to take a picture of the tool to cut external threads but it is in essence just a strait piece of too steel with the same 60 Degree ground point. |
 |
| Just about finished |


 |
| I will post pictures of the finished caps, price and add a link in my store when they are complete. |
ok my turn........
ReplyDelete