 |
| A Stainless Steel warehouse of glory |

Friday, April 29, 2011
This Place Rules!
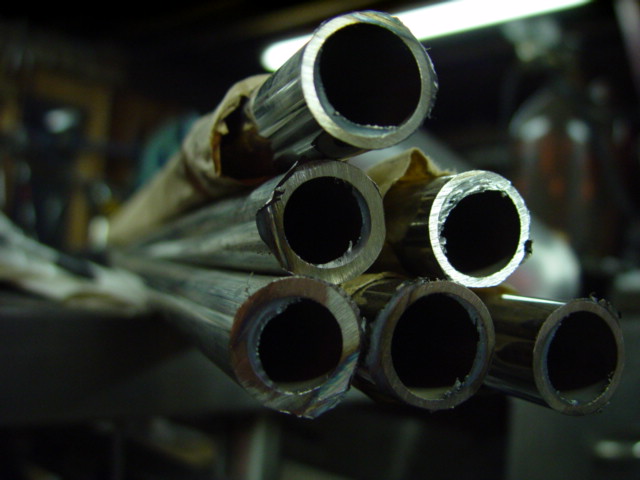
McCarty and sons Stainless Steel is about 30min from my shop. This place is awesome, they have every Stainless alloy in stock in any size you could imagine including scrap pieces; all at an extremely fair price. Check them out in person if your local or on their website. www.mccartyandsons.biz
Wednesday, April 27, 2011
Struttin'
Finished up a SS strut/license plate mount/tail light setup and added some weight to the rear of the bike with the flat struts all at the same time.


Tuesday, April 26, 2011
Monday, April 25, 2011
Why buy quality when you can buy cheap?
I'm in the process of doing one of my tail light setups on a customer bike and while removing the old I noticed the weld connecting the mounting bracket to the license plate back was cracked from top to bottom. This un-named unit has a two piece steel construction which is just a piece of 1/8" welded to a piece of 3/16". Herein lies the problem. Thin steel bolted way out back on a rigid framed bike (Sportster) in this case acts like a tuning fork. Hang 2.3lbs off that combined with half seam welds and shake it at lets say 5 beats per second and it's bound to break. The assemblies I'm producing have a full 1/4" 6061 aluminum construction and weigh just under 1.5lbs. They also have an 1 1/4" offset mount which moves the plate closer inboard reducing stress on the bracket as well as keeping your bike looking clean and not goofy.
You could spend $120 on a generic model A assembly, bolt it on, take a step back and say: "Nice! now my bike looks like every other guys!" Ride it, have it break and then spend another $120 or you could just buy quality to begin with.


You could spend $120 on a generic model A assembly, bolt it on, take a step back and say: "Nice! now my bike looks like every other guys!" Ride it, have it break and then spend another $120 or you could just buy quality to begin with.


Thursday, April 21, 2011
Cool Find
Today's mission was to find some pipe plugs for use on the sporty oil and gas tank in order to keep the sealant in, and no I don't use Kreeeeeeme. The sealer I use is an industrial grade brand but it is available to the public; made by U.S. Standard. Anyways I went up to my usual hunting spot and found a lot of really good stuff. I can't believe I find so much new shit every time I go.


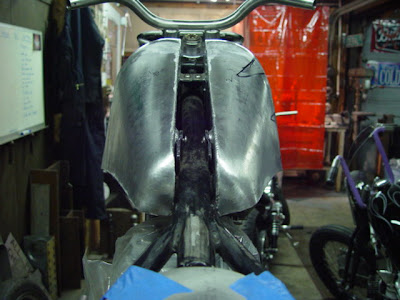
Tanked
Finally got some work done after screwing around for the last couple days trying to figure out how I wanted these tanks to look and what the best approach would be. Just have to sand them, make some gas caps and bungs, petcock and finish the mounting tabs then its on to the rear.


Sunday, April 17, 2011
Side Bar Gadgets
Check out the side bar I added new links to merchandise to make shopping easier. Just click on T- Shirts or Original Parts and it links directly to a shopping page.


Saturday, April 16, 2011
For Sale: E-FaB Panhead!
If you are looking for a reliable, fun different bike for a reasonable price than check this thing out. This isn't some half assed build, this bike has been tested and tuned, tweaked and changed until it was just right. Click the link.
 | |
| http://cgi.ebay.com/ebaymotors/Eastern-Fabrications-Panhead-Shovelhead-Custom-Chopper-/320686309811?pt=US_motorcycles&hash=item4aaa64c1b3 |
Tuesday, April 12, 2011

How To: Single Point
I decided to make a few gas caps and their respective bungs today for sale/use in the future. As luck would have it I got a text message from my buddy stating that he needed to figure out how to cut threads on his lathe. So, I grabbed my camera and took some pictures of how I do it.


 |
| The selectors for speed, feed, threading, carriage direction, etc. |
 |
| Thread cutting chart for my machine. Any lathe that can cut threads has a chart which lays out the position you will need to put the corresponding leavers in to cut whatever thread you want. |
 |
| My machine has a four position spindle selector. One of the positions is "threading." The others are Off, Forward and reverse. When I am going to thread a piece I select "threading" and the drive motor runs at a pre-set speed which I believe to be around 100rpm. |
 |
| Select lead screw which is designated by the red dot. |
 |
| Here's the tool I use to cut internal threads. This is where you need to be exact. This tool needs to be ground to 60 Degrees. |
 |
| Pictured is the thread count dial or the half nut dial or whatever you want to call it. Here is the deal with this. Notice the notch in the housing which is lined up with the notch above the 4. For this particular job I decided to cut 8 TPI, so every time the 4 lines up with this mark I can engage the half nut leaver. 8/2=4 so that's why I chose the 4. If you are cutting 6 TPI than use 3 as your engagement mark. For something like 13 TPI I use the 1 as a reference. The rule is that the TPI # needs to be divisible by the number you are selecting on your thread counter dial. I choose to go with the number that is closest to the TPI I am using. 8 is divisible by 2 as well but 4 is the closer number so that's what I use. Whatever number you start with you need to use for the whole job. This is the only way to ensure the tool stays in the same path every cut. |
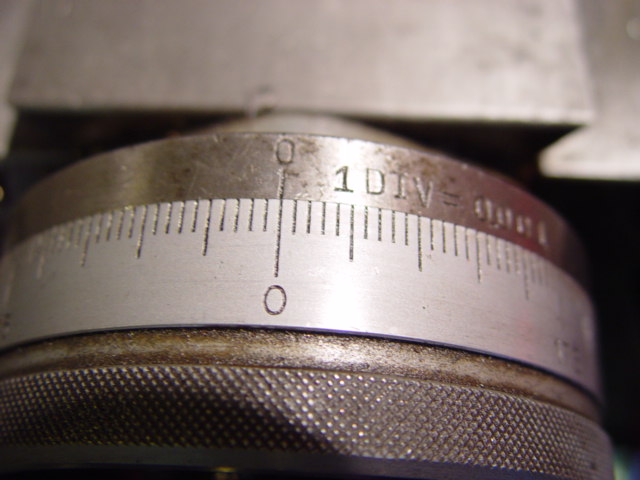 |
| Pictured is the dial on my cross slide handle. I zero it on the work piece than turn it in (when cutting external threads) or out (when cutting internal threads) .010 at a time. When the thread cut is at .050 deep I make 3 or 4 passes or until I'm not removing any more material to ensure I'm at the depth the dial is reading. Once sure I continue the cut as long as the thread depth calls for it. |
 |
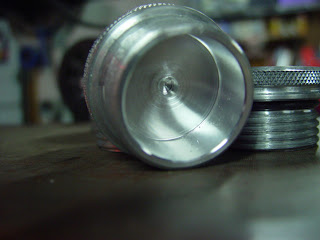
| Pictures is the finished bung for the gas cap. |
 | |||
| This is a picture of the aluminum before cutting the thread. Notice the chamfer and the run off. The chamfer is important because it allows the tool to cut as deep as your going to need. Without it your workpiece and/or tool will flex when running it in and the cut will not be accurate causing a tight spot on the threads. The run-off at the end is done to act as a stopping point for the tool so it doesn't crash into your work. I forgot to take a picture of the tool to cut external threads but it is in essence just a strait piece of too steel with the same 60 Degree ground point. |
 |
| Just about finished |


 |
| I will post pictures of the finished caps, price and add a link in my store when they are complete. |
Monday, April 11, 2011
Gas Cap
So I had a video of the machining process but I cant get it to upload so here are a couple pics.


Subscribe to:
Posts (Atom)